
Drag and drop can be achieved by using different styles on form like: tree control or list panel control as those types of approach can be very easy from development perspective sometime they can be not so user friendly.
Let's imagine a situation where we have requirement to see customers and their contacts in new form and in it we should be able to freely remove contacts from customer and add them again. This can be easily achieved by list panels:

But we can see that more columns we add to list panels the less readable it becomes. How can user distinguish between different columns? The same goes for tree control more information we add the less readable it becomes from user perspective. What we can do to allow users easy access to add/remove contacts and to make it more user friendly is use drag and drop functionality on grid properties.
To start off lets created simple form to show all the customer records, add CustTable as new data source and add three new fields to grid – customer name, account number and phone:

Grid properties:

Name and phone are display method from customer table, our form looks like this:

Now we will add twice as the data source the table ContactPerson, let's call one ContactPersonAllocated and other ContactPersonNotAllocated:

Both should have those properties set:

Now create 2 new groups under existing grid, one for horizontal split:


Initialize splitter in code:


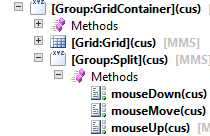
Override three methods on Split group control:


Second group to store our tables for drag and dropping – this group will hold two new grids and splitter group between them:

Properties to change for each of new elements:


Splitter again should be initialize in code:


Now we can add some fields to our grids, in my presentation I have used some base information to present Id, names, address and phone number of contact listed in each grid, we need to make sure that in each grid fields are taken from correct data sources:

If we opened form now we would see the same information in both grids so we will add some range in both data sources. Let's start with contacts which belong to customer, so the “ContactPersonAllocated” data source, declare new range and override init() and executeQuery() methods on data source:


And for the second “ContactPersonNotAllocated we will follow the same procedure with new range:


As last step for range we need to override active() method on CustTable data source:

Now our form will show on left contacts assigned to customer and on the right the contacts not assigned. So now final steps for our drag and drop functionality, we should have on both grids property “DragDrop” specified as “Manual”. On each grid methods override the drop() method as this is where we will be changing the records.
We want to add reference between contact and customer when we drop the contact from right to left and refresh the data to show correct values. And When we move contact from left to right we want to remove the connection so let’s write new method in form methods called updateContact():

Now add code to drop() method on grid where we show allocated contacts:

And to drop() on grid with not allocated contacts:

Final view of form:


