
Microsoft Power BI is the industry-leading business intelligence application for creating powerful data connections, models and reports, which can be easily shared through the Power BI service. And you can start using it for free right now. Follow this simple guide to get started with the Power BI Desktop app and Dynamics 365 for Sales.
1. Install app
Download and install the Power BI Desktop app, and sign up for the free service.
2. Get started
Opening the Power BI app presents you with the welcome screen where you can (left panel) instantly Get Data, access Recent Sources or Open Other Reports.
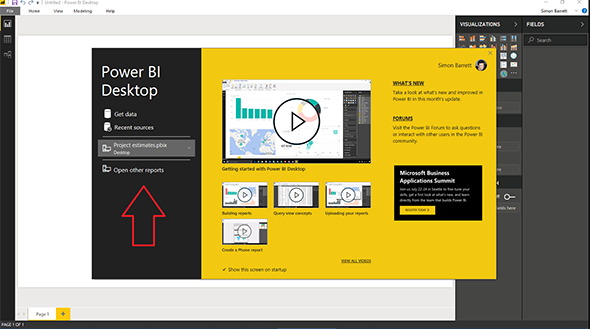
Close the welcome screen and we are in the Report view. The left side menu also gives you access to the Data view and the Relationship view.

3. Connect to data
We first need to connect to a source of data. To see the possible data sources, go to the Home ribbon > Get Data. Click More for further data source options.

In Online Services select Dynamics 365 (online) and click Connect.

Enter the Instance Web API of your Dynamics 365 Sales instance. [This can be found at Settings > Customizations > Developer Resources > copy the address in Instance Web API.]

If an error results with "OData: The feed's metadata document appears to be invalid." then go to the next step (3a).
In the Access OData feed dialog click Organizational account, and then click Connect (You need to be logged in to your Dynamics 365 instance. If you aren't signed in, click Sign-in on the Access OData feed dialog before you click Connect.). The Navigator window opens, showing available database entity tables. You have the option to Edit the query before loading the table, or just Load the table. Go to step 4.
3a. If you get an error trying to connect, go back to the Get Data dropdown and select Blank Query.

In the formula bar enter:
= OData.Feed("Your Instance Web API")
and hit enter. A list appears of the available feeds. Select the feed you want by clicking on its “table” and load the query into Power BI Desktop by clicking on the Close & Apply button in the ribbon.

4. Shape data
Now we can adjust or ‘shape’ the data. Open the Query Editor at Home > Edit Queries.
Here we can carry out a range of transformations, remove columns, edit headers, etc. Any changes made to the data in the Query Editor will not affect the original data source.

First, we will remove all unwanted columns. Next, we will clean up the data. In the country field, the ‘UK’ also appears as ‘United Kingdom’, so let’s change all those instances to ‘UK’.

All changes are listed in the APPLIED STEPS panel and can easily be rolled back by clicking the X by the change you want to cancel.
After all desired changes are made, click Close & Apply.
5. Create visualisations
We create visualisations and reports in the Power BI Desktop Report view, which has 5 main areas:
- The ribbon provides access to common tasks associated with reports and visualisations
- The Report view, or canvas, where visualisations are created and arranged
- The Pages tab area, which lets you select or add a report page
- The Visualisations pane, where you can change visualisations, customise colours or axes, apply filters, drag fields, etc.
- The Fields pane, where query elements and filters can be dragged onto the Report view, or dragged to the Filters area of the Visualisations pane.

Let’s create a visualisation showing the number of leads per country. We can select from a variety of visualisations in the Visualisation pane and then drag the data fields we wish to display from the Fields pane.
We have renamed the first of our fields to “Lead by country” and dragged it to the Legend area and the Values area, where it automatically creates a chart by count.

6. Share reports
To share our report we can save the .pbix file and send it like any other file or we can publish it to the Power BI service by simply clicking the Publish button in the ribbon. Select the Workspace to publish your report.

7. Continue creating
You will now find the published report on your Power BI service, where you can continue to Edit report and create new visualisations to pin to a dashboard.

